Flutter - 파일 처리 ② drag & drop으로 파일 입력 받기(desktop_drop)
목차
1: Flutter - 파일 처리 ① 파일 들고 오기(file_picker)
file_picker패키지를 사용하여 파일 들고 오기
2: Flutter - 파일 처리 ② drag & drop으로 파일 입력 받기(desktop_drop) <현재>
desktop_drop패키지를 사용하여 웹에서 drag & drop으로 파일 입력 받기
3: Flutter - 파일 처리 ③: UTF-8·CP949 디코딩, CSV Converter
- 읽어 온
UTF-8또는CP949로 인코딩된 파일을 디코딩하기
desktop_drop
desktop_drop 패키지로 다른 웹 페이지들처럼 파일을 drag & drop으로 편하게 업로드할 수 있다.
지원하는 플랫폼들이다.
| Platform | Availability |
|---|---|
| Windows | ✅ |
| Linux | ✅ |
| macOS | ✅ |
| Android | ✅(preview) |
| Web | ✅ |
desktop_drop: ^0.3.2
dependencies에 추가
import 'package:desktop_drop/desktop_drop.dart';
import 'package:cross_file/cross_file.dart';

import 'dart:typed_data';
cross_file: XFile을 다룰 때 사용
typed_data: Uint8List를 다룰 때 사용
예제
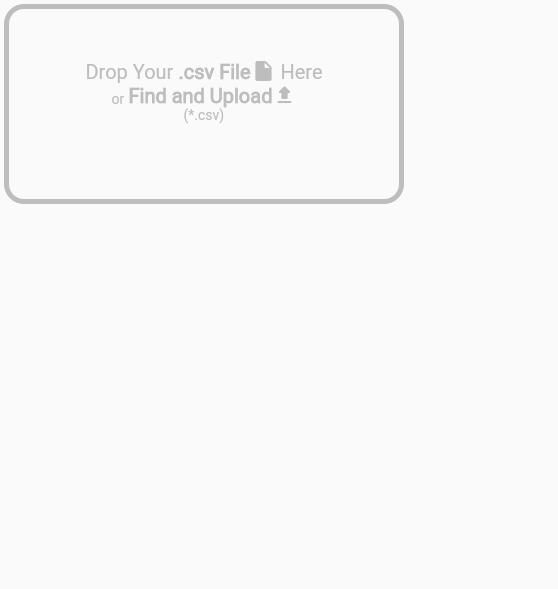
드래그 드랍으로 파일 읽어 오는 예제를 만들어 보자
파일을 올리면 컨테이너 색을 파랗게 해서 티를 내주자
  bool _dragging = false;
  Color uploadingColor = Colors.blue[100]!;
  Color defaultColor = Colors.grey[400]!;


    DropTarget(
      onDragDone: (detail) async {
        debugPrint('onDragDone:');
        if( detail != null && detail.files.isNotEmpty ){
          String fileName = detail.files.first.name;
          Uint8List fileBytes = await detail.files.first.readAsBytes();
          debugPrint(fileName);
          setState(() {
            showFileName = "Now File Name: $fileName";
          });
          /*
          do jobs
          */
        }
      },
      onDragEntered: (detail) {
        setState(() {
          debugPrint('onDragEntered:');
          _dragging = true;
        });
      },
      onDragExited: (detail) {
        debugPrint('onDragExited:');
        setState(() {
          _dragging = false;
        });
      },
      child: makeDropZone(),
    )
child를 DropTarget으로 감싸 child에 드래그 앤 드랍으로 파일을 올릴 수 있다. 현재 코드에서 child인 makeDropZone()은 저번 코드와 유사한 컨테이너다.
onDragDone: 유저가 드래그 & 드랍을 끝내 파일을 올렸을 때다. 외부에서 파일을 읽어 오는 것이므로, async이다.
읽어온 파일의 경우 XFile 타입이다.
.readAsBytes(): 파일 바이트를 Uint8List로 읽어올 수 있다.
onDragEntered: DropZone 안에 파일 드래그가 처음 들어 왔을 때다. 위 코드에서는 컨테이너의 색을 바꿔 주기 위해 bool 타입 변수 _dragging을 true로 바꾸고 setState해줬다.
onDragExited: DropZone 밖으로 파일 드래그가 나갔을 때다. 위 코드에서는 컨테이너의 색을 바꿔 주기 위해 bool 타입 변수 _dragging을 false로 바꾸고 setState해줬다.
전체 코드
전체 코드 보기
import 'package:flutter/material.dart';
import 'package:desktop_drop/desktop_drop.dart';
import 'package:cross_file/cross_file.dart';
import 'package:file_picker/file_picker.dart';
import 'dart:typed_data';

class FileDragAndDrop extends StatefulWidget {
  const FileDragAndDrop({Key? key}) : super(key: key);

  @override
  FileDragAndDropState createState() => FileDragAndDropState();
}

class FileDragAndDropState extends State<FileDragAndDrop> {
  final List<XFile> _list = [];

  String showFileName = "";

  bool _dragging = false;

  Color uploadingColor = Colors.blue[100]!;
  Color defaultColor = Colors.grey[400]!;

  Container makeDropZone(){
    Color color = _dragging ? uploadingColor : defaultColor;
    return Container(
      height: 200,
      width: 400,
      decoration: BoxDecoration(
        border: Border.all(width: 5, color: color,),
        borderRadius: const BorderRadius.all(Radius.circular(20)),
      ),
      child: Column(
        mainAxisAlignment: MainAxisAlignment.center,
        children: [
          Row(
            mainAxisAlignment: MainAxisAlignment.center,
            crossAxisAlignment: CrossAxisAlignment.end,
            children: [
              Text("Drop Your ", style: TextStyle(color: color, fontSize: 20,),),
              Text(".csv File", style: TextStyle(fontWeight: FontWeight.bold, color: color, fontSize: 20,),),
              Icon(Icons.insert_drive_file_rounded, color: color,),
              Text(" Here", style: TextStyle(color: color, fontSize: 20,),),
            ],
          ),
          InkWell(
            onTap: () async {
              FilePickerResult? result = await FilePicker.platform.pickFiles(
                type: FileType.custom,
                allowedExtensions: ['csv'],
              );
              if( result != null && result.files.isNotEmpty ){
                String fileName = result.files.first.name;
                Uint8List fileBytes = result.files.first.bytes!;
                debugPrint(fileName);
                setState(() {
                  showFileName = "Now File Name: $fileName";
                });
                /*
                do jobs
                 */
              }
            },
            child: Row(
              mainAxisAlignment: MainAxisAlignment.center,
              crossAxisAlignment: CrossAxisAlignment.end,
              mainAxisSize: MainAxisSize.min,
              children: [
                Text("or ", style: TextStyle(color: color,),),
                Text("Find and Upload", style: TextStyle(fontWeight: FontWeight.bold, color: color, fontSize: 20,),),
                Icon(Icons.upload_rounded, color: color,),
              ],
            ),
          ),
          Text("(*.csv)", style: TextStyle(color: color,),),
          const SizedBox(height: 10,),
          Text(showFileName, style: TextStyle(color: defaultColor,),),
        ],
      ),
    );
  }

  @override
  Widget build(BuildContext context) {
    return DropTarget(
      onDragDone: (detail) async {
        debugPrint('onDragDone:');
        if( detail != null && detail.files.isNotEmpty ){
          String fileName = detail.files.first.name;
          Uint8List fileBytes = await detail.files.first.readAsBytes();
          debugPrint(fileName);
          setState(() {
            showFileName = "Now File Name: $fileName";
          });
          /*
          do jobs
          */
        }
      },
      onDragEntered: (detail) {
        setState(() {
          debugPrint('onDragEntered:');
          _dragging = true;
        });
      },
      onDragExited: (detail) {
        debugPrint('onDragExited:');
        setState(() {
          _dragging = false;
        });
      },
      child: makeDropZone(),
    );
  }
}
이전 포스트인 파일 처리 ① 파일 들고 오기(file_picker)에 이어진 코드다.
컨테이너에 파일을 바로 드래그해서 업로드하거나,
Find And Upload 버튼을 클릭해서 탐색기에서 파일을 찾아 올릴 수도 있다.
굿
댓글남기기